

How To Make A Gif With Photoshop Elements
Past using the timeline window in Photoshop, you tin create blithe looping GIFs out of whatsoever image.
Knowing how to make your ain GIFs ways you tin turn whatever funny video into a meme-worthy reaction in the groupchat, but it'south also a useful skill for school and piece of work projects. A lot of motion designers use GIFs on their online portfolios considering they load faster than videos and play automatically. GIFs are too keen visuals for slideshow presentations because they add together endless motility to an otherwise static slide.
Whether you lot're making a GIF for school, a task, or merely for fun, learning how to add move is an like shooting fish in a barrel style to take artwork to the adjacent level. Let's first by doing a simple frame-by-frame animation and turning it into a looping GIF using Adobe Photoshop.
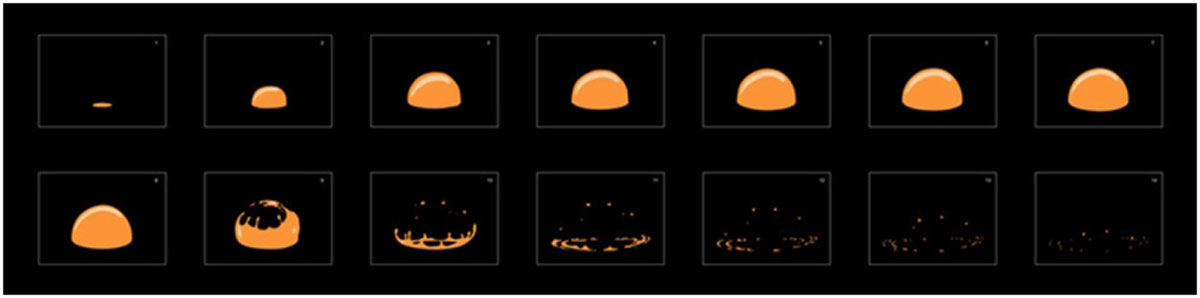
For this instance, I'll be using these blitheness frames I found on Adobe Stock. Withal, you can make a GIF in Photoshop with whatsoever images you would like.
(If you're interested in doing more than frame-by-frame animations, you might enjoy Adobe Animate.)
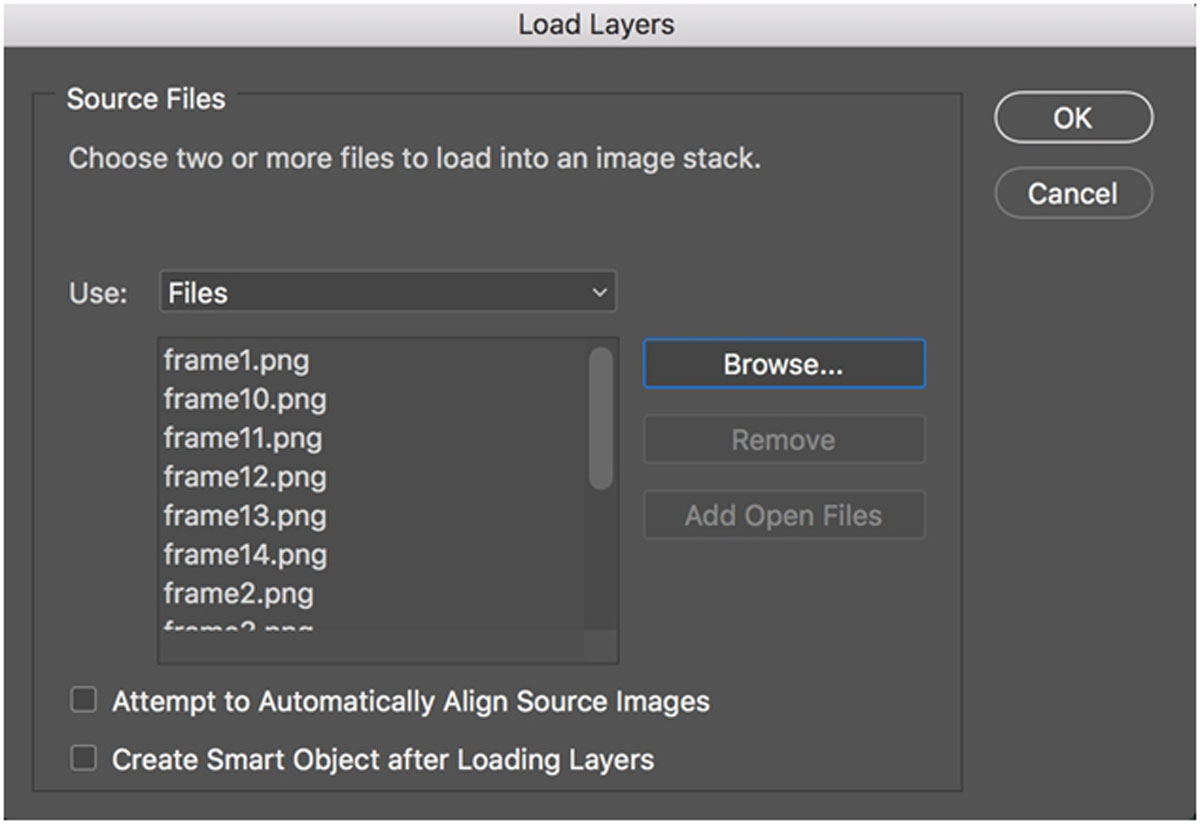
- Open your frames as layers in a Photoshop file.
My favorite method is to prepare my frames in another plan, like Adobe Illustrator. Then, I import them into Photoshop by going to File > Load Files into stack. Add all of the frames and press "OK."
If you oasis't already created the frames, yous can employ any Photoshop file that has multiple layers. Simply exist sure that each frame of your blitheness is its own layer (or folder/group of layers).
Want to brand a GIF out of a video clip? This tutorial will work with short videos likewise! Go to File > Import > Video Frames to Layers. Select your file here. (You lot may accept to choose just a segment of the video, if information technology is too long.)
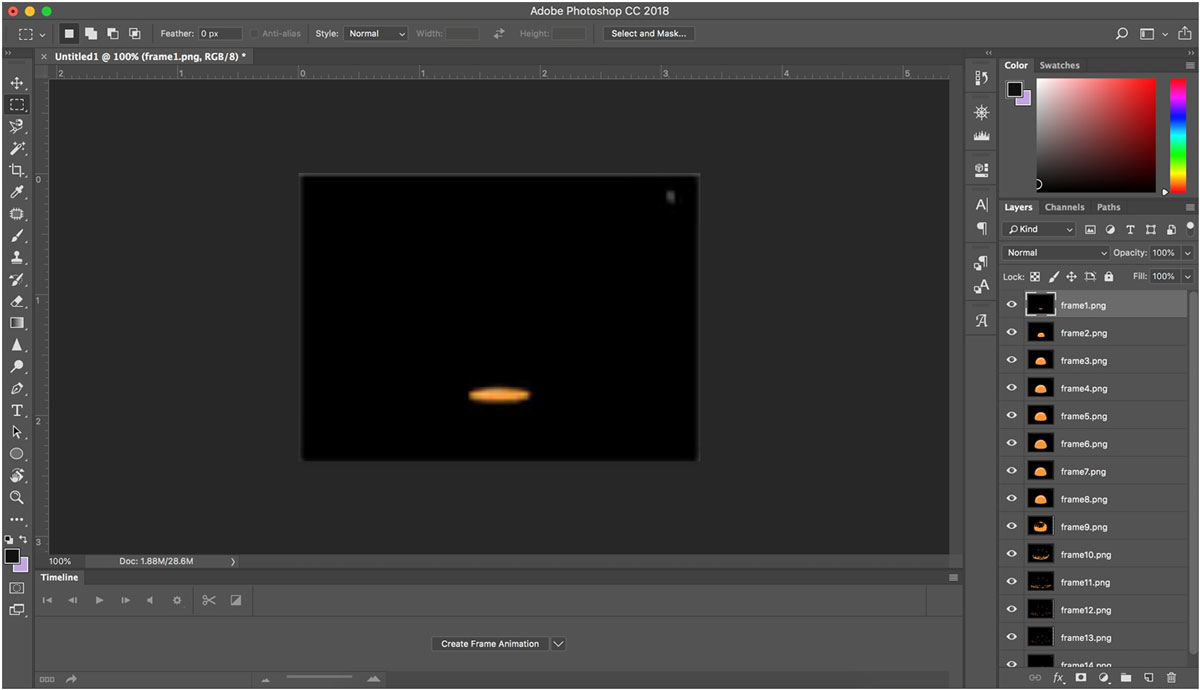
- Open up the timeline window and click "Create Frame Animation."
With your layers open up in Photoshop, become to Window > Timeline. Then click "create frame animation."
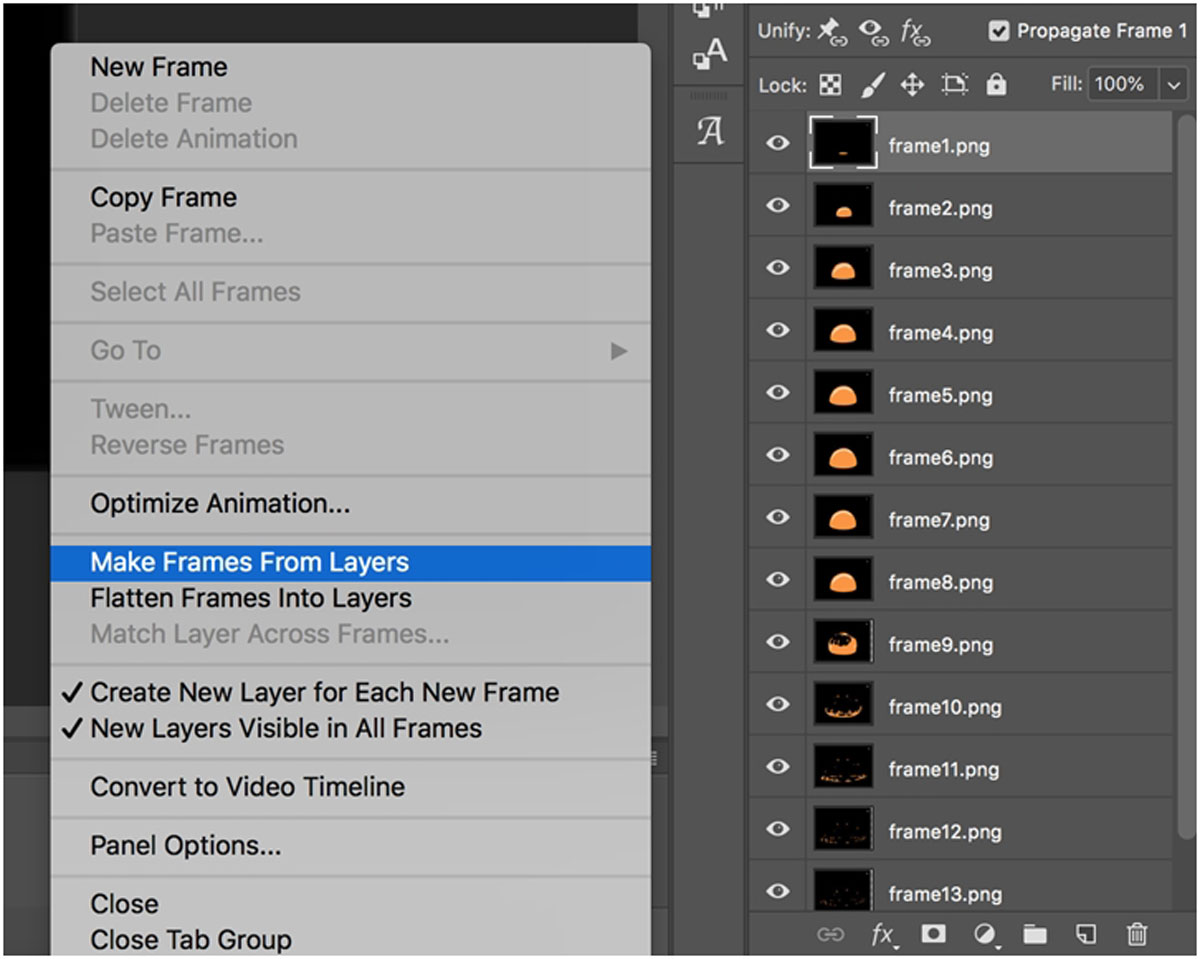
- Select "brand frames from layers" from the carte.
This will permit you to take your layers and dissever them into frames within the timeline window. You tin can play around with the order of the frames by dragging them. The trash can icon tin can delete a frame and the viscous note icon tin add a new one.
In the timeline, you tin also adjust how long each frame is on screen. You can too decide how long the GIF loops—most GIFs are set to loop "forever."

- Sentinel your GIF!
Preview the animation by either pressing play on the timeline or using the spacebar on your computer. Once you are happy with the final result, go to File > Export > Save for Spider web (Legacy), and make sure y'all save as a GIF.
Source: https://makeitcenter.adobe.com/en/blog/create-gif-photoshop.html
Posted by: schultzhenceld68.blogspot.com
0 Response to "How To Make A Gif With Photoshop Elements"
Post a Comment